

Mail merging is the most efficient way to personalize your emails at scale. Fortunately, Constant Contact makes both bulk importing contacts and customizing your emails extremely straightforward.
Better yet, Constant Contact offers a few ways to successfully complete this process so that you can choose the method that fits your needs.
Before Getting Started
You’ll need to have your Constant Contact account ready before diving into mail merge. Here’s what you need to do:
-
Ensure your email address is fully verified as non-verified emails can’t be used in the platform
-
Add your physical mailing address to comply with legal requirements. This ensures that your campaigns are compliant and trustworthy.
Keep in mind that Constant Contact won’t let you send a single email until these tasks are complete so it’s important you get them out of the way first.
Importing Your Contacts
Importing contacts requires a few preparatory steps for optimal organization and personalization.
Adding Custom Fields (Optional)
First check if you have any unique information about your contacts not covered by Constant Contact’s default fields. These standard fields include:
- Email address
- First name
- Last name
- Company
- Phone numbers (home, work, mobile)
- Address details (Street address lines, City, State/Province, Zip/Postal Code, Country)
- Birthday
- Anniversary
- Job title
- Website
- Tags
- Notes
In some situations, you might need additional fields to capture specific subscriber data. Constant Contact allows adding custom fields for such information.
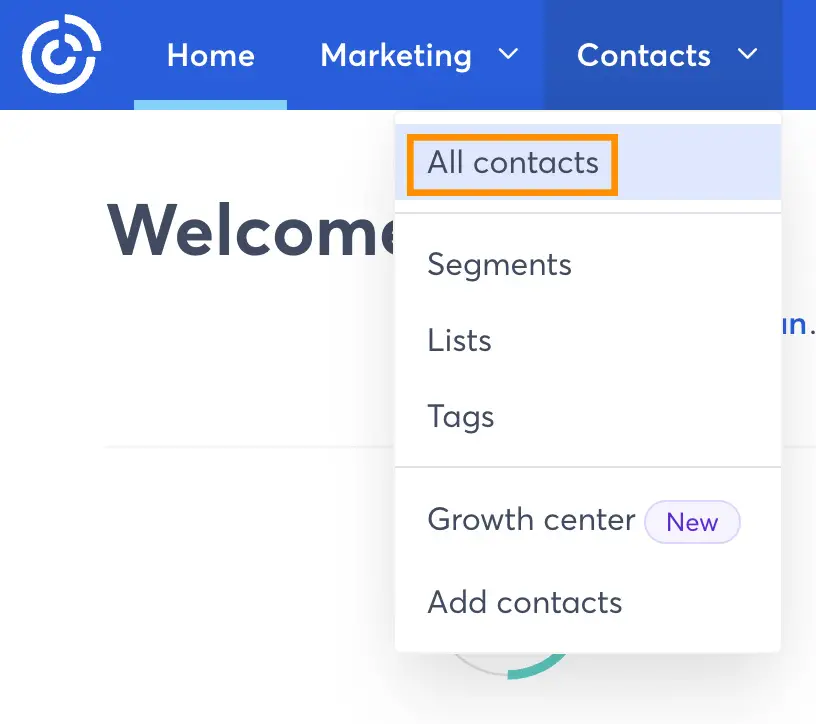
To start this process, select “All Contacts” under the “Contacts” tab. This can be found in the main dashboard.
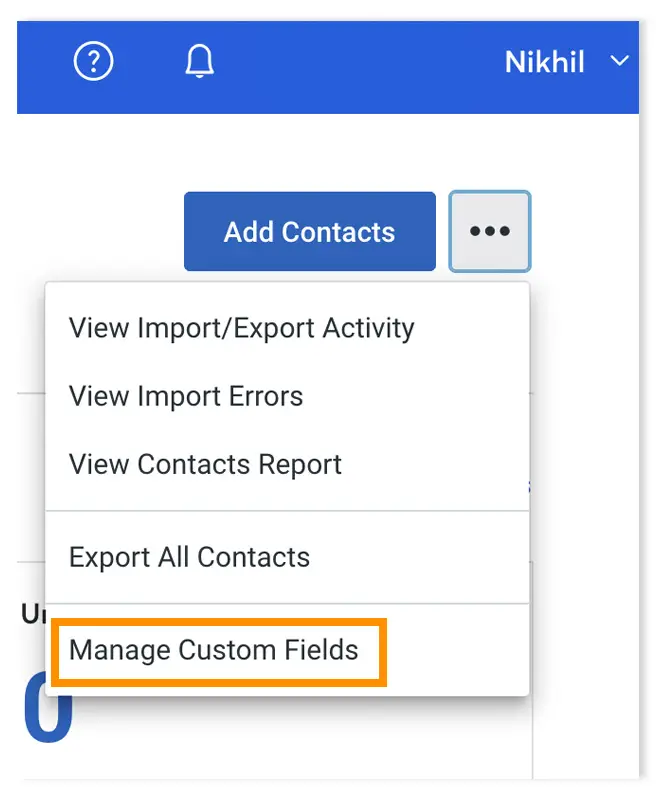
Click the three dotted lines found on the right hand side and choose “Manage Custom Fields”.
Here you can add your custom entries. We’ll add ‘Favorite Color’ this demonstration.
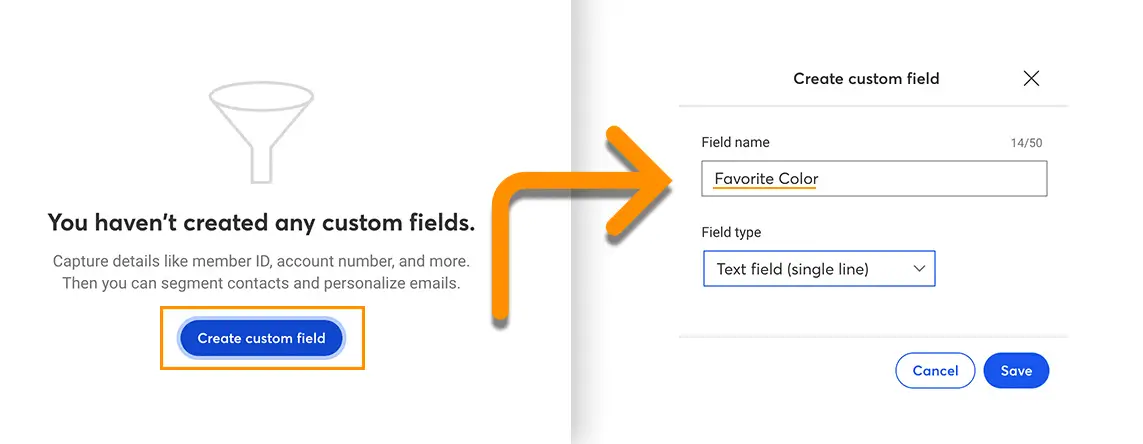
Save your changes once completed.
Features like this, alongside Constant Contacts CRM capabilities, really do make managing your contacts much easier.
Preparing Spreadsheet for Import
Constant Contact is compatible with a range of file formats such as .xls, .xlsx, .vcf, .csv, and .txt. Excel files (.xlsx) are most commonly used.
Enter your contacts in rows and their data in columns accordingly:
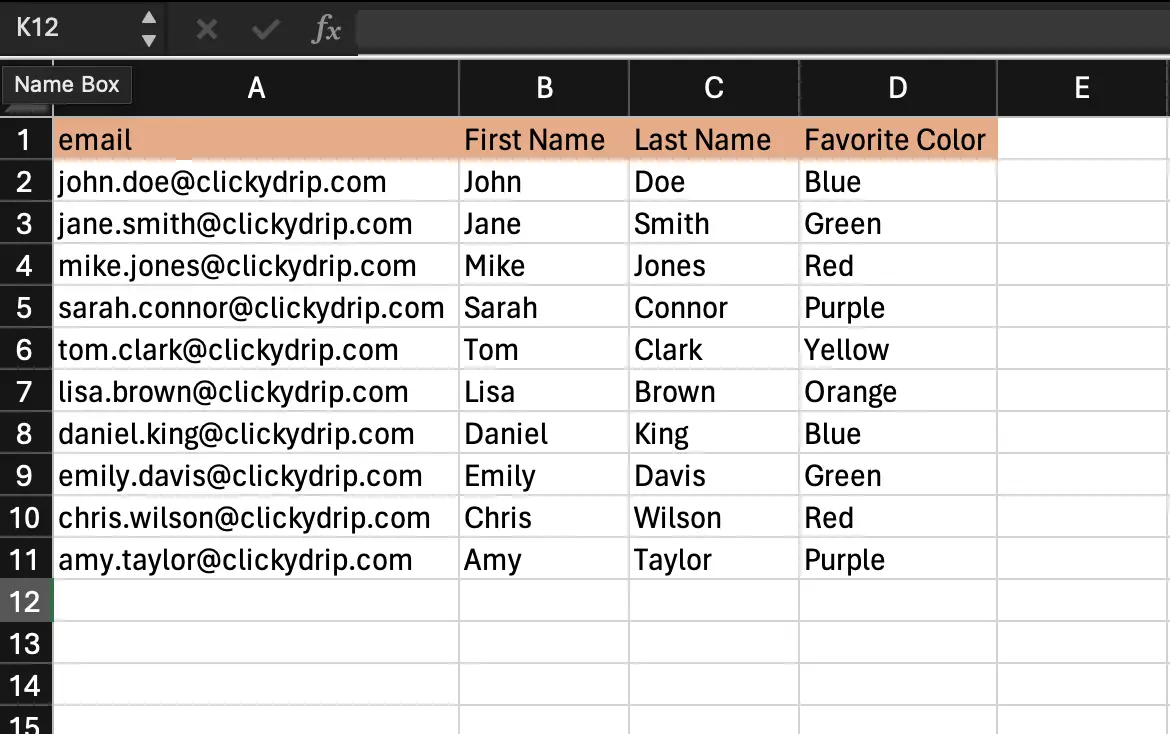
Though labeling columns as Constant Contact field names simplifies the import process, it’s not mandatory.
Save your document when it’s ready.
Importing Subscribers into Constant Contact
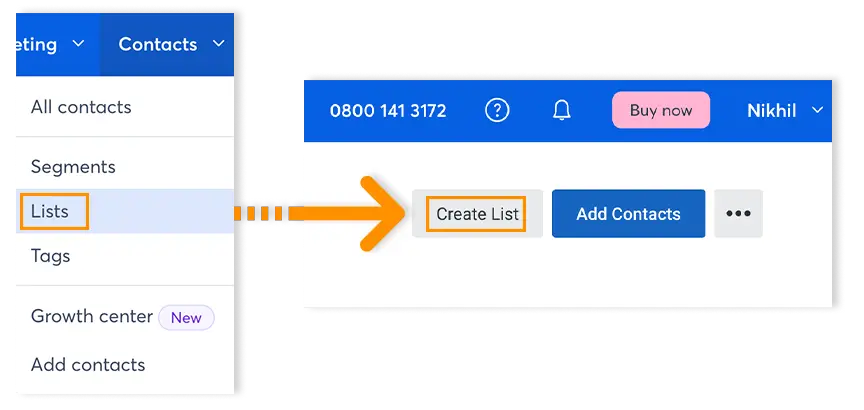
In your Constant Contact account access the “Contacts” section from the top menu like we did before and select “List”. On this page, select “Create list”.
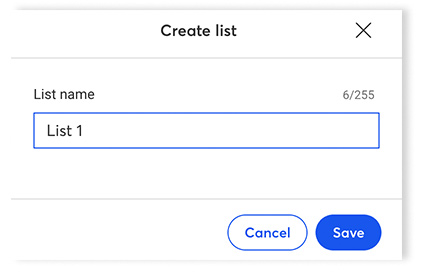
To create your list, use internal names like “List 1.”
Once your list has been named, select “Add Contacts” and choose “Upload file.”
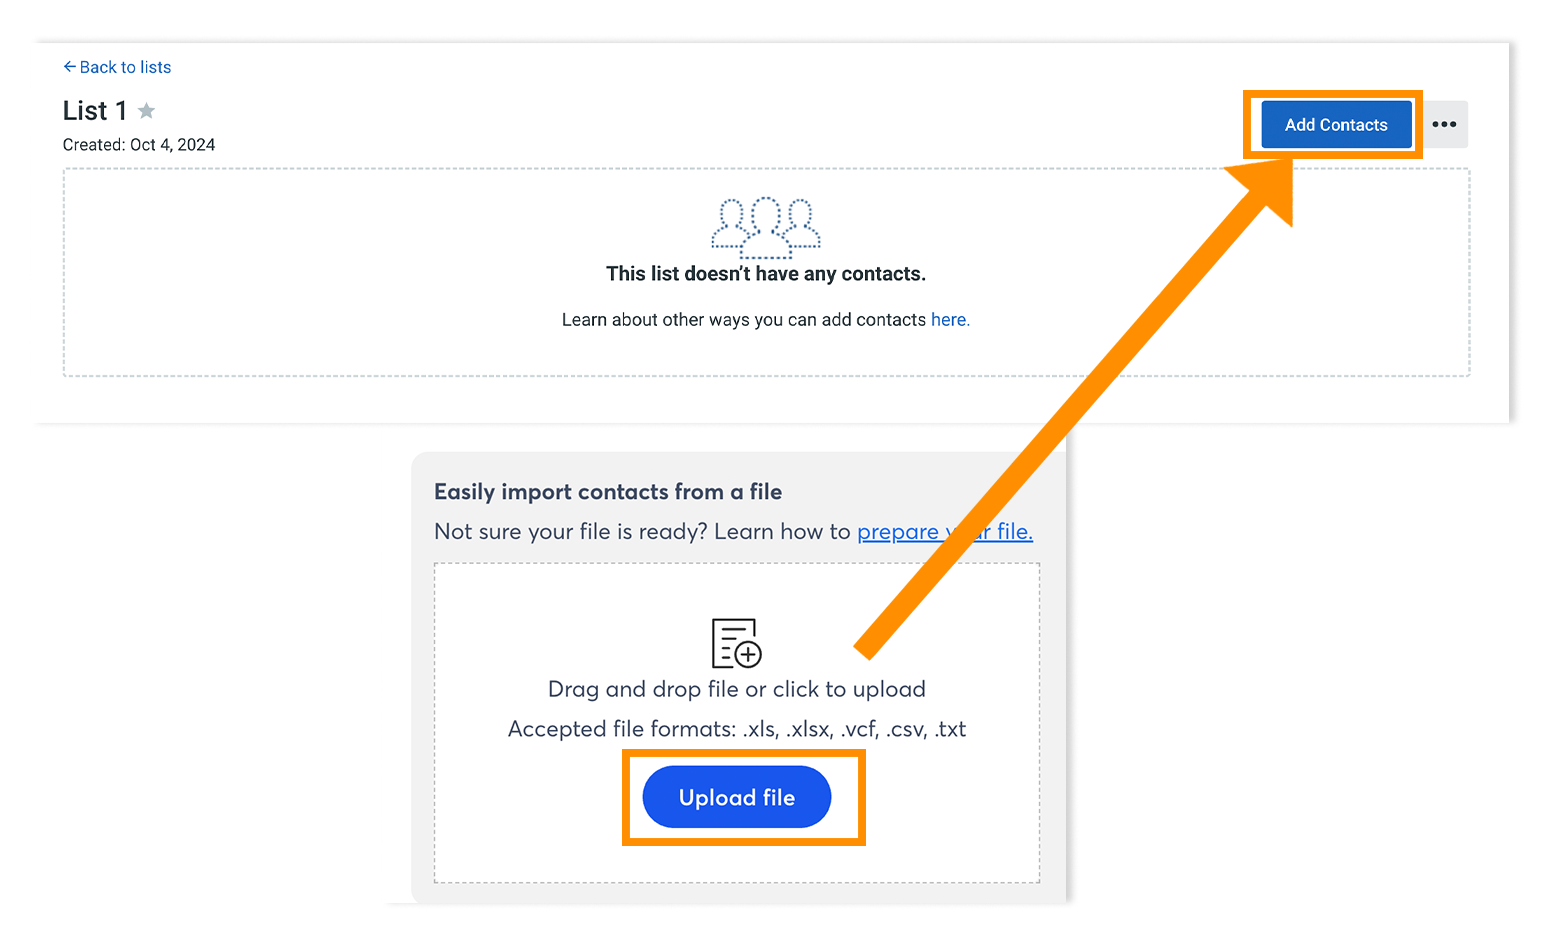
You will then have the option drag and drop or to upload your contact file. Then click “Continue” to proceed.
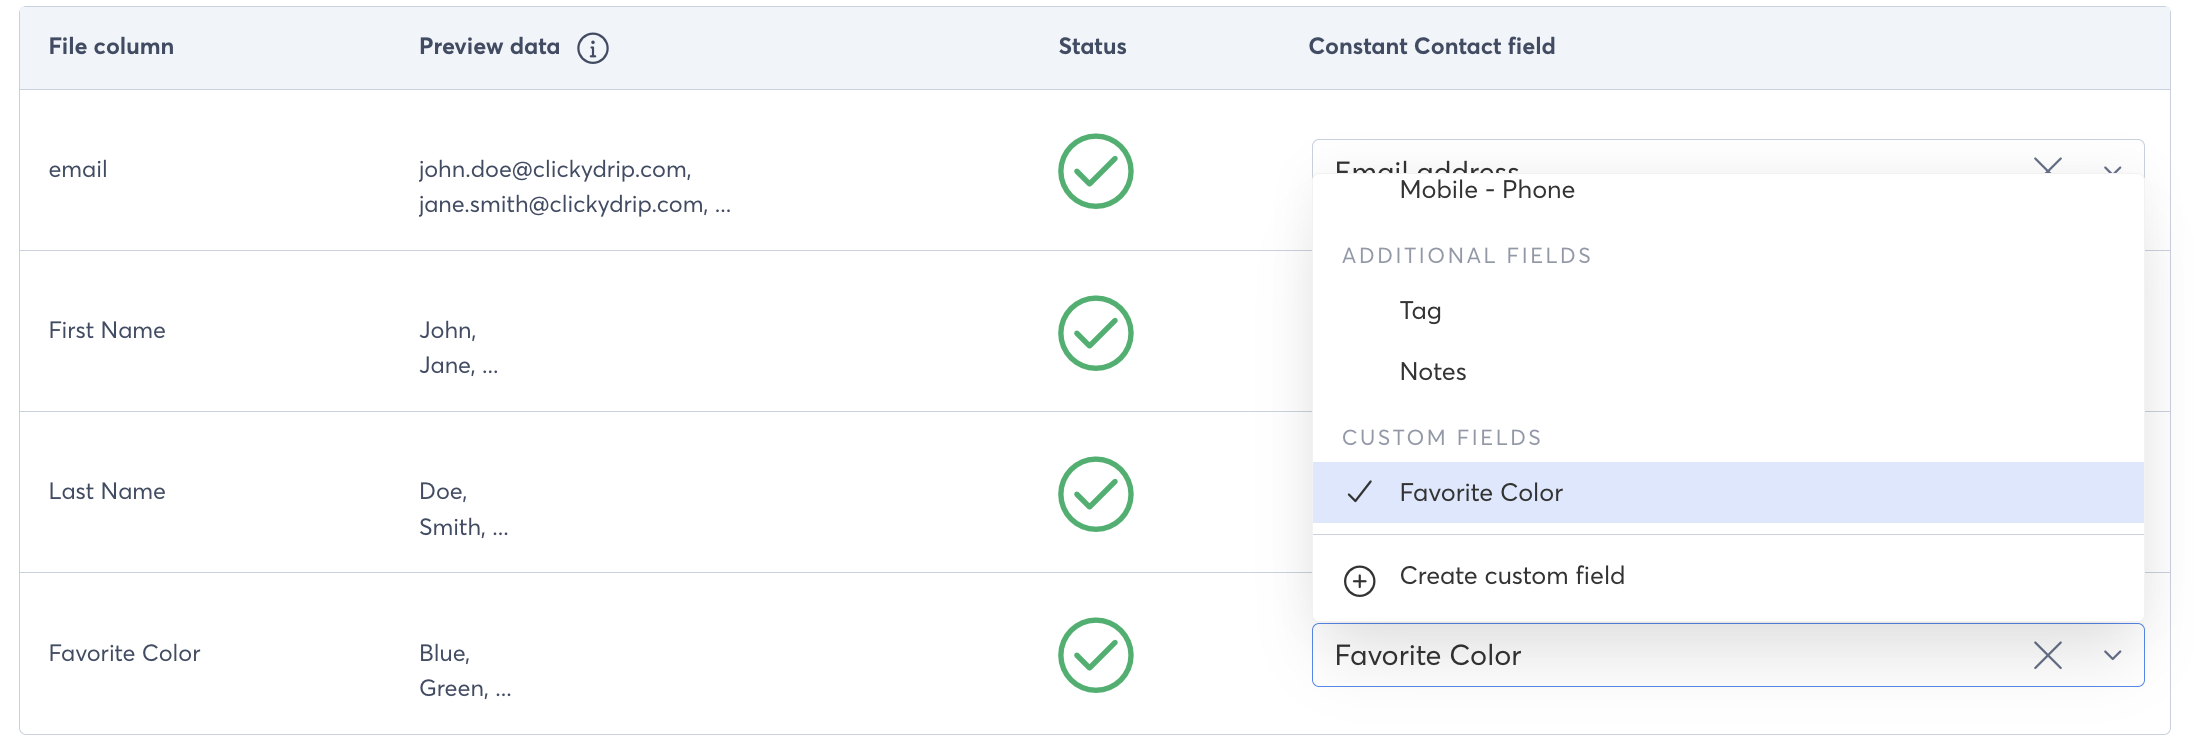
If column labels match Constant Contact’s field names, the system automatically maps your data. This is shown by green ticks as shown in the picture below.
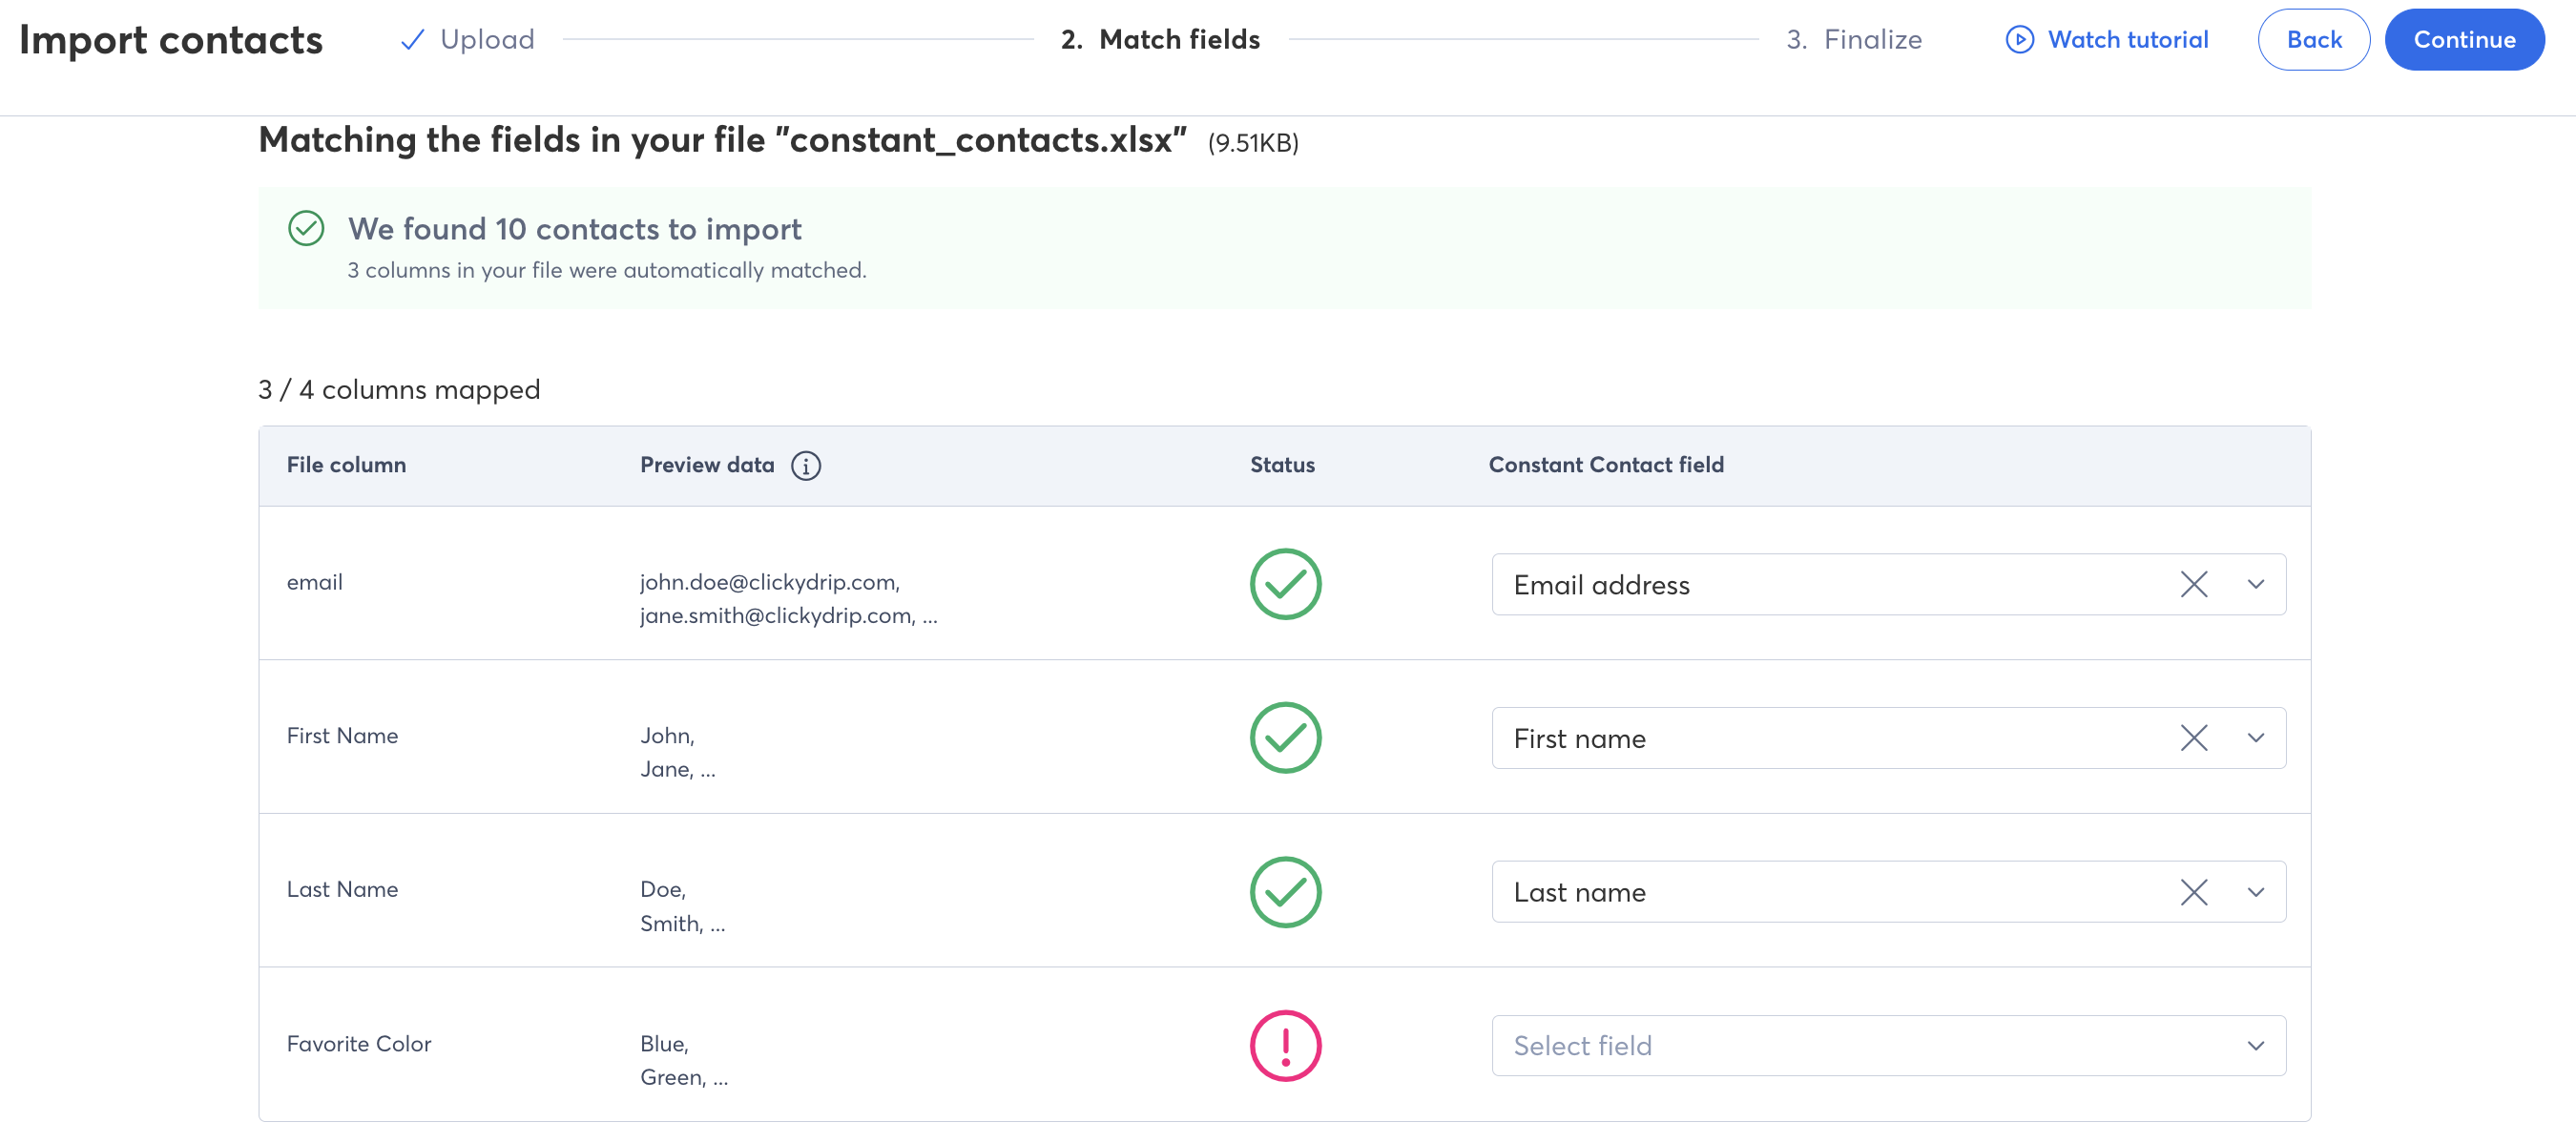
Now you might be wondering… what about the red cross? Well that’s unmatched columns which require manual matching using the drop-down menu (select field). For this demonstration, we removed the custom field (Favorite Color) which we added before prior to our import. You will also have the option to create the custom field here using the drop down menu.
Ensure all columns correspond correctly; for instance, “Favorite color” is what we would choose (in case you’re wondering mine is orange).
After confirming the matches, click continue. You will then be prompted to finalize your file where you will need to confirm whether you have permission to email these contacts. To learn more about these permissions, refer to Constant Contact’s knowledge base.
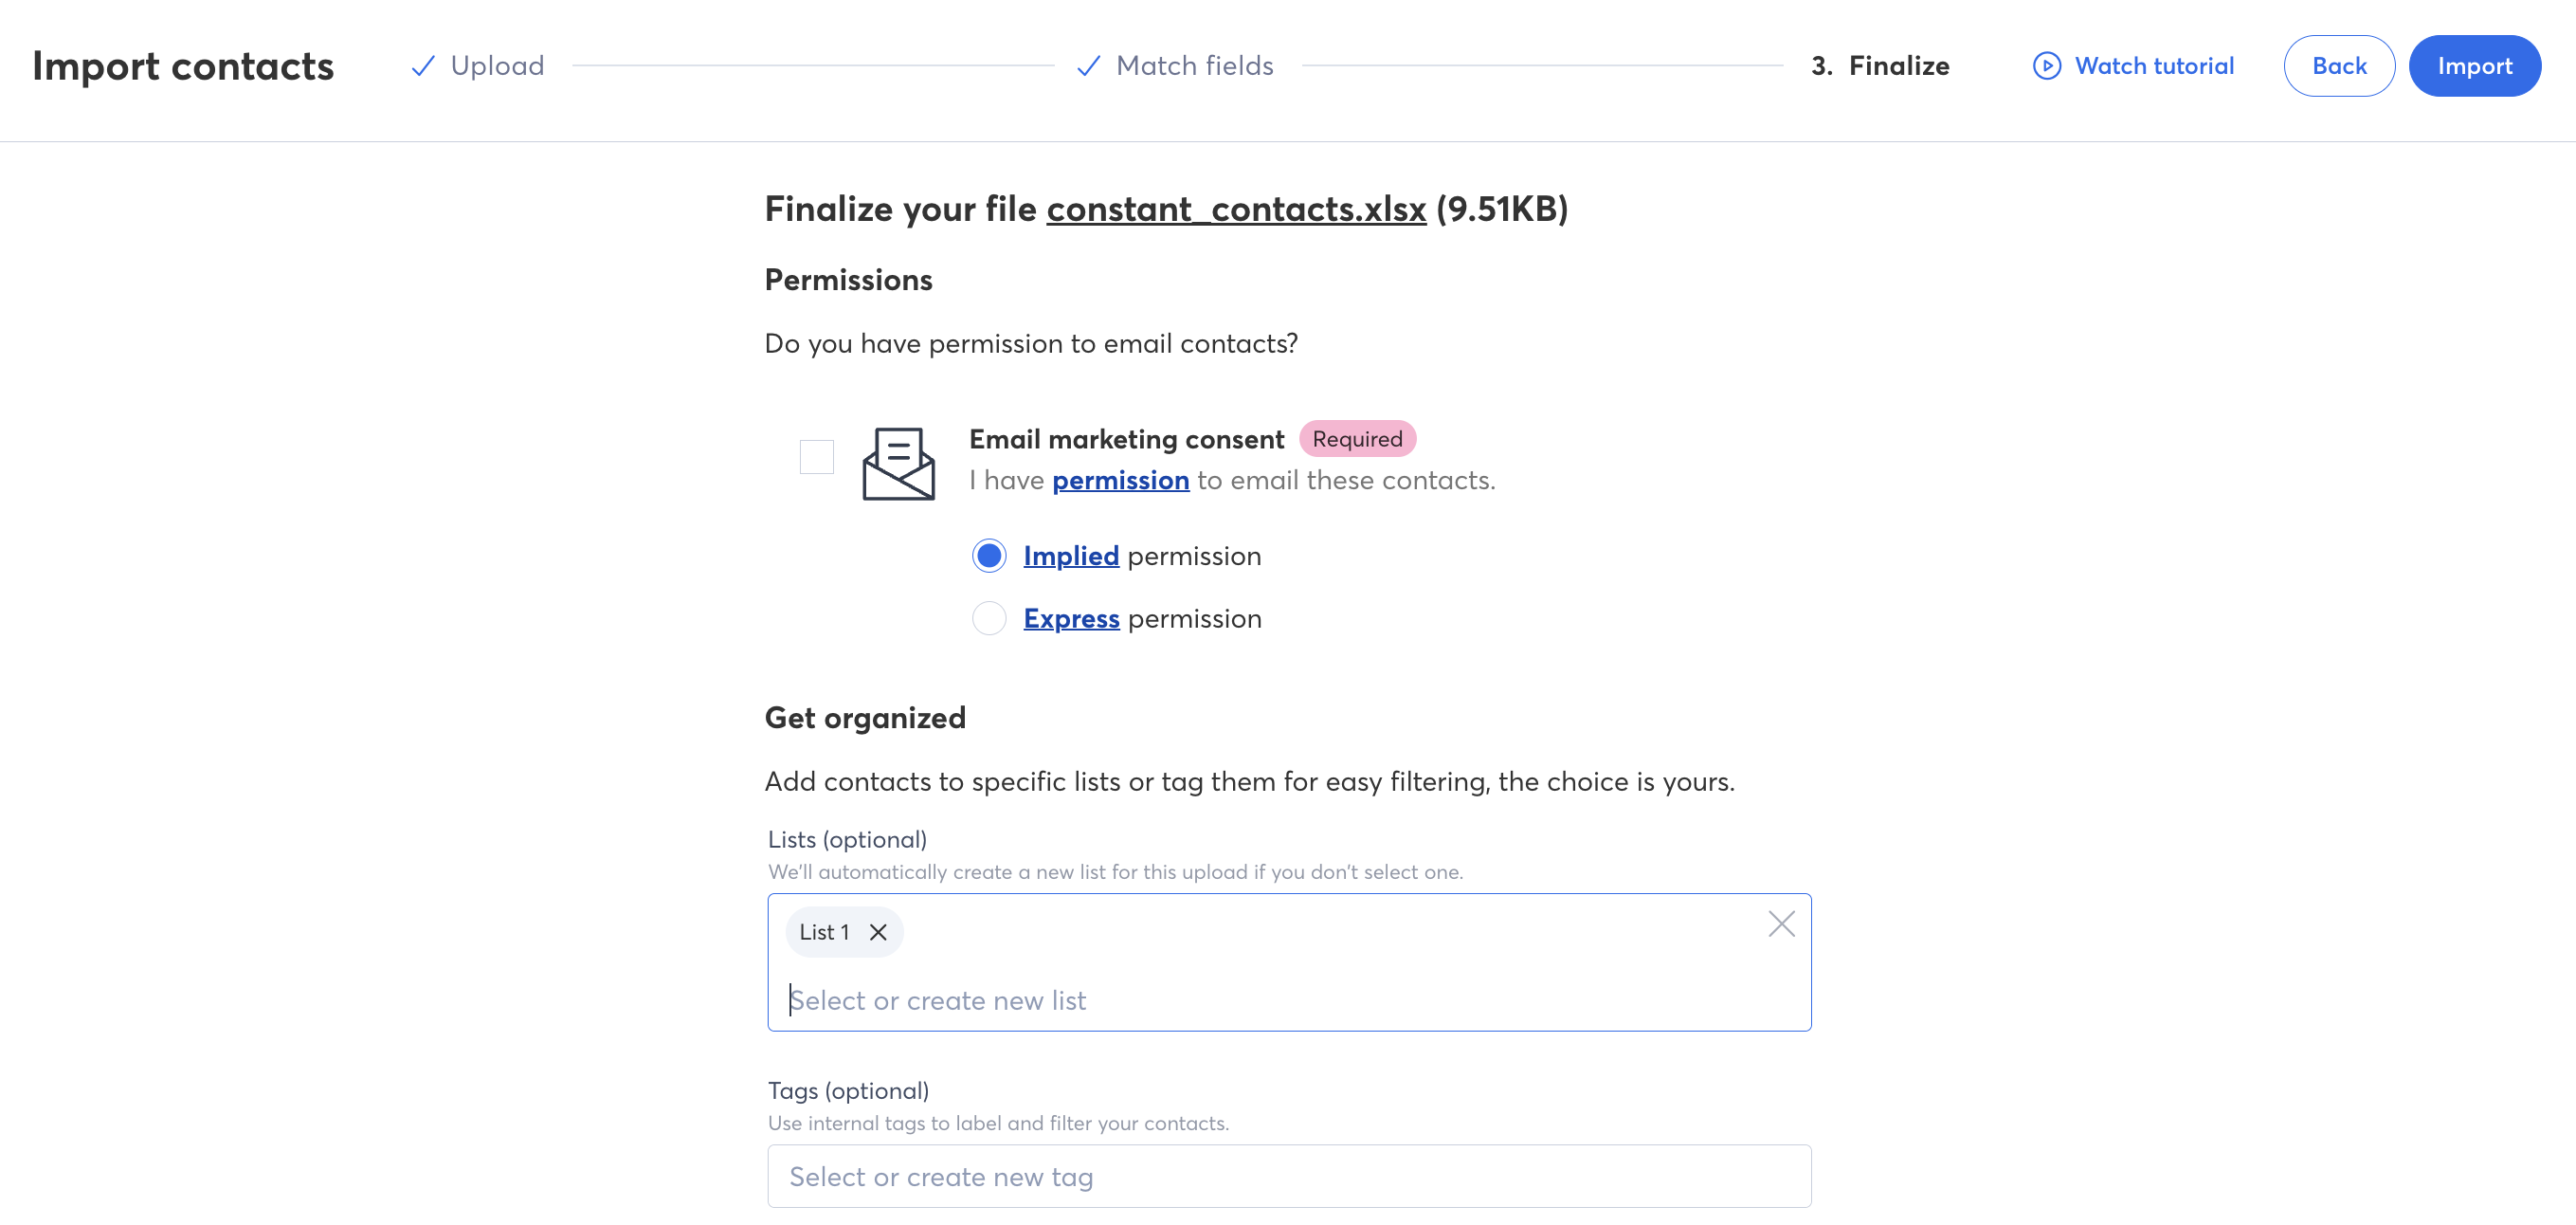
Simply select any other lists you want to add these contacts to. Additionally, you can tag your contacts. Tagging is simply a way to add attributes to contacts in order to more effectively categorize them. Once finished, click upload.
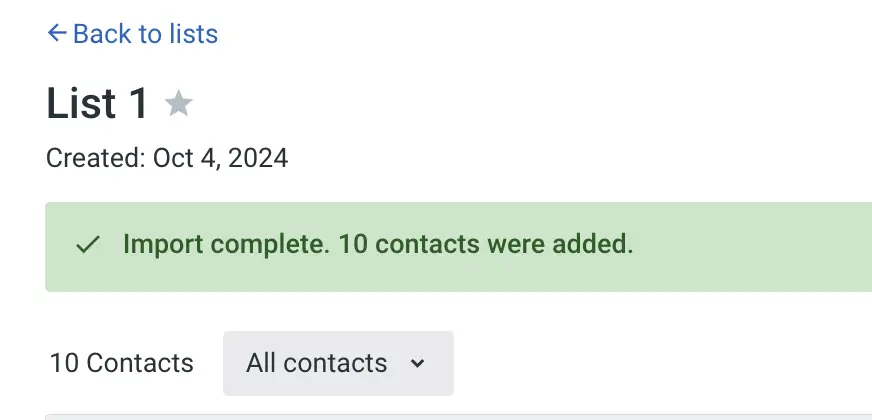
With your contacts imported, you’re set to launch effective email campaigns.
Personalizing Your Emails
With that sorted, you’re now ready to unlock the potential of your email campaigns by personalizing messages. The best part? This can be done at scale.
To get started, click on the top menu and click the “Create” button in the middle of the page.
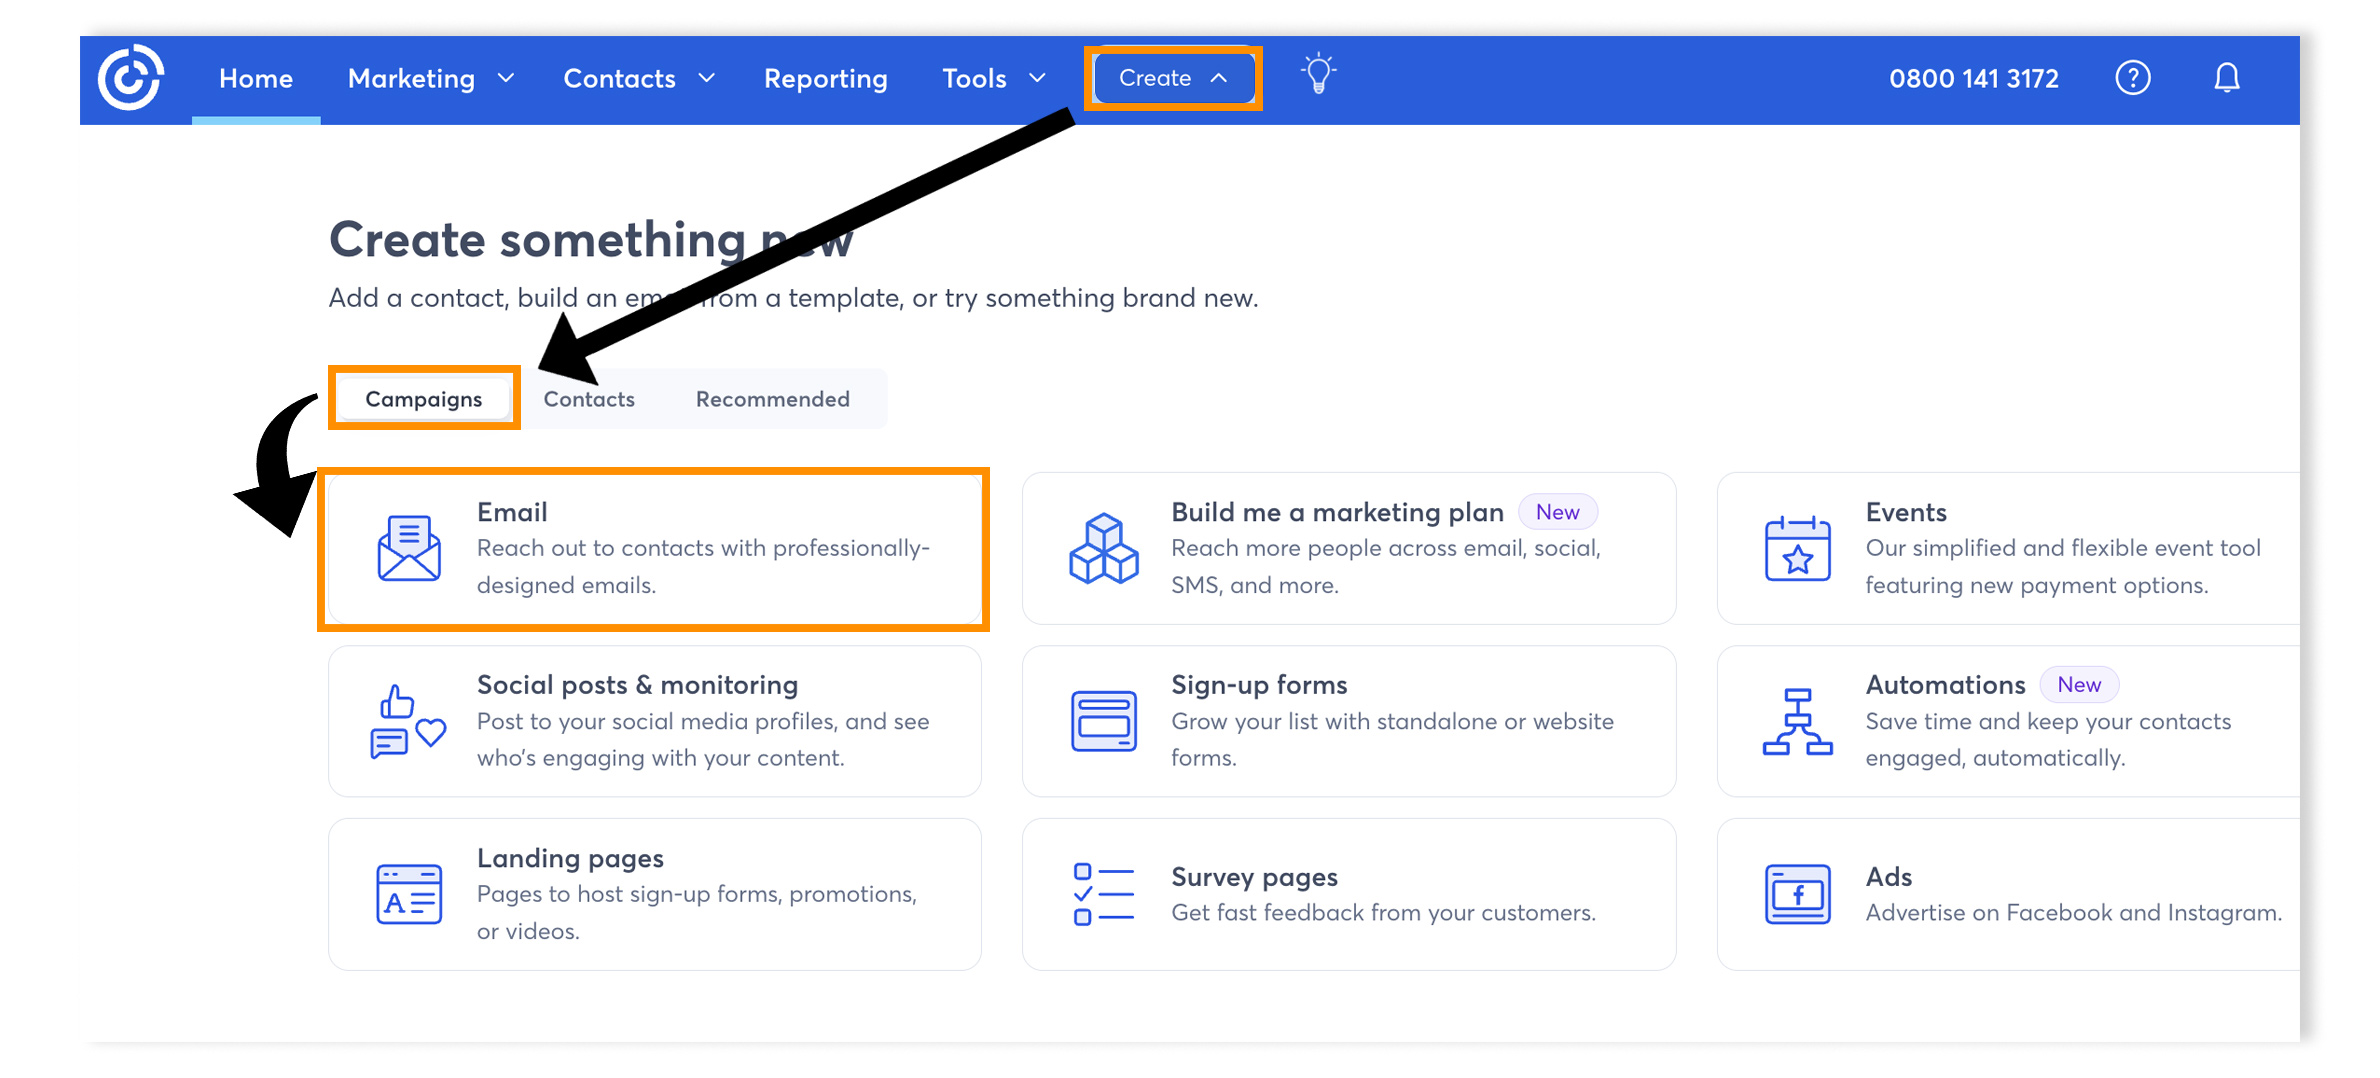
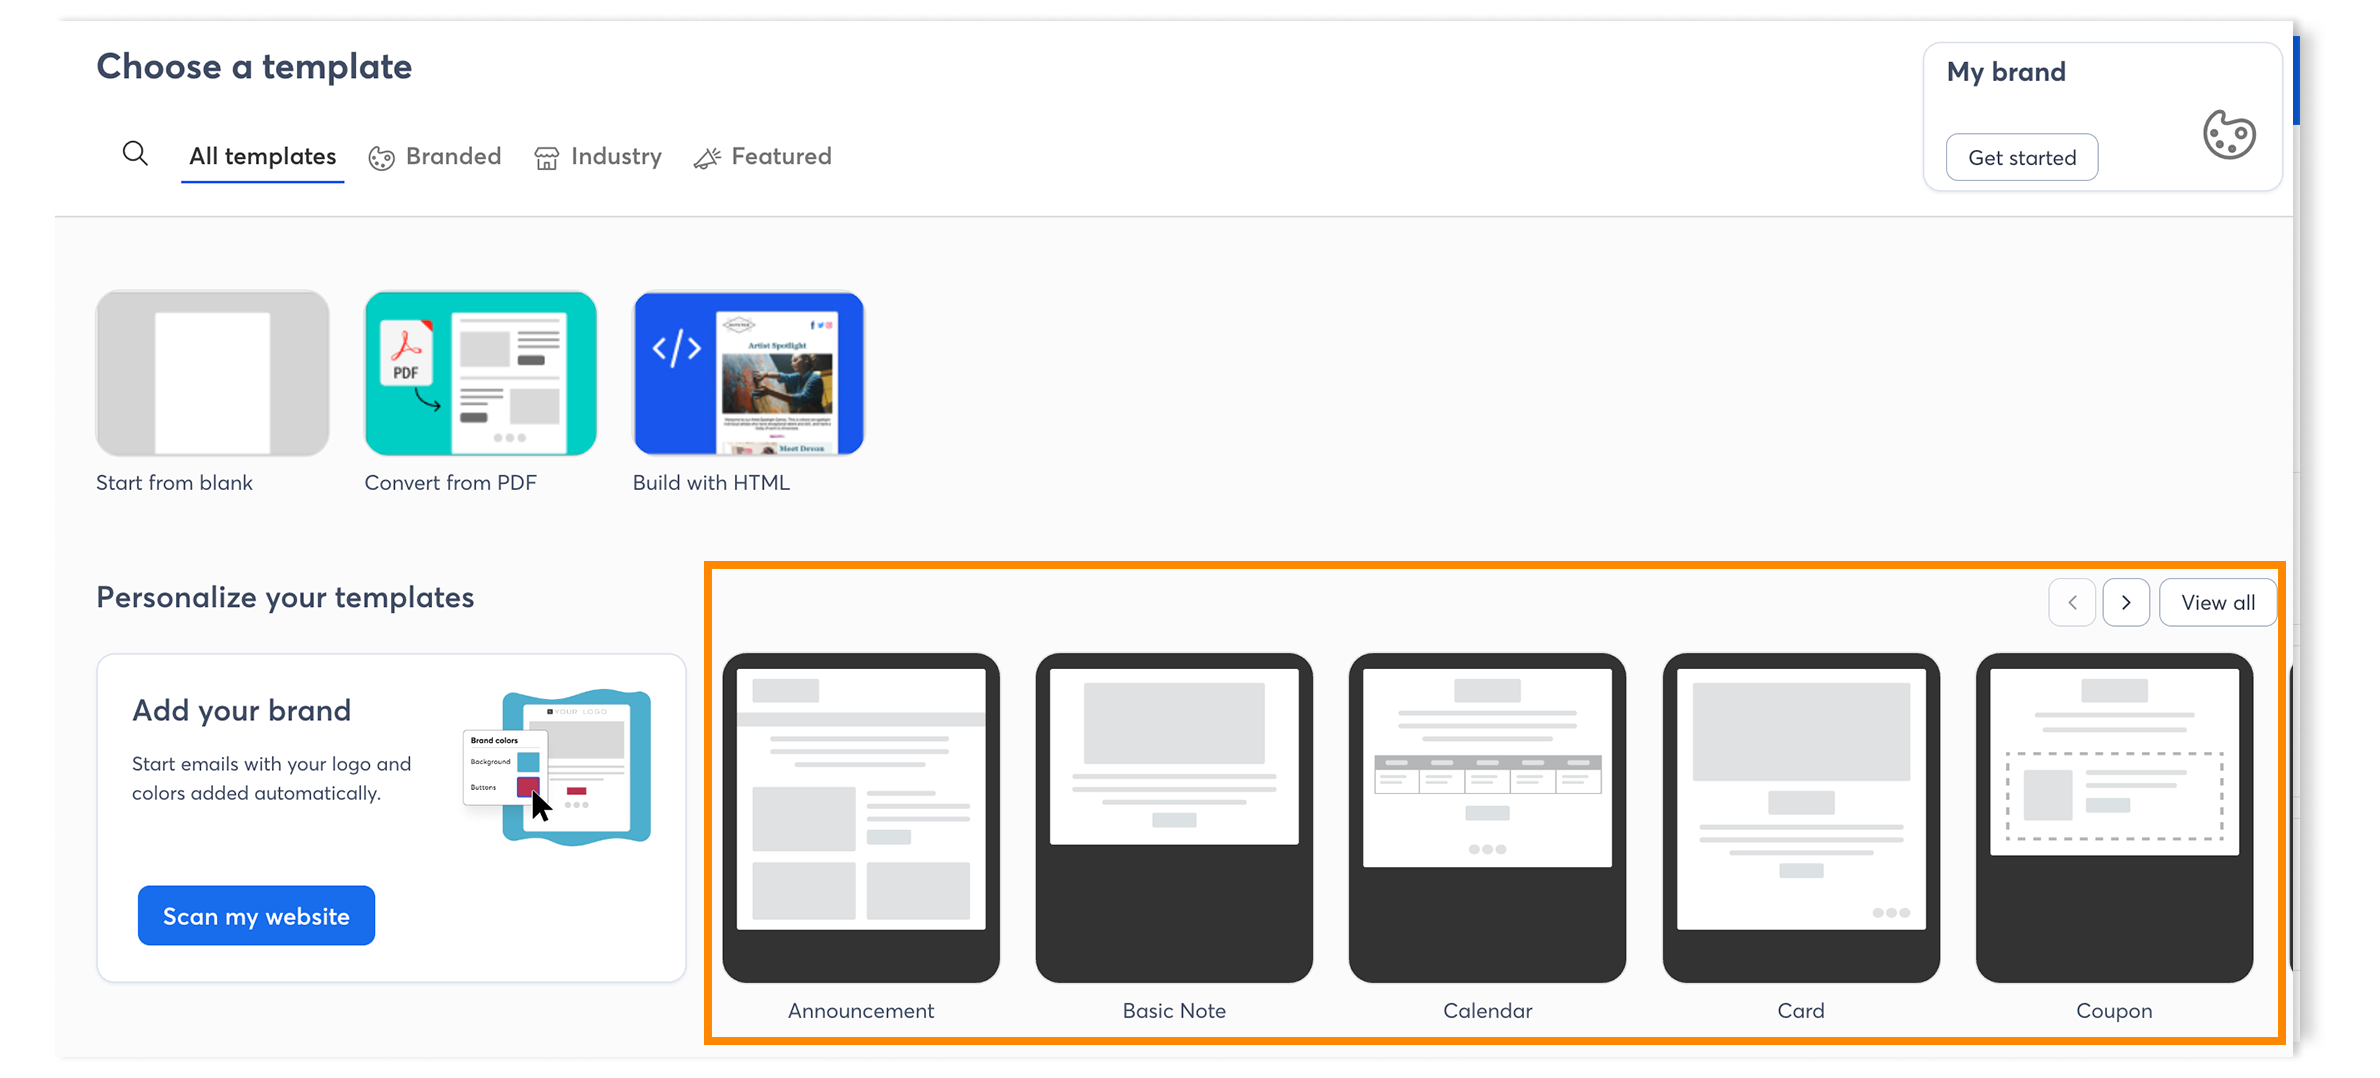
Ensure “Campaigns” is selected. You will be presented with a variety of campaigns to start from social posts to landing pages. Select “Email”
From here, you will need to select a template of your choice depending on your goals.
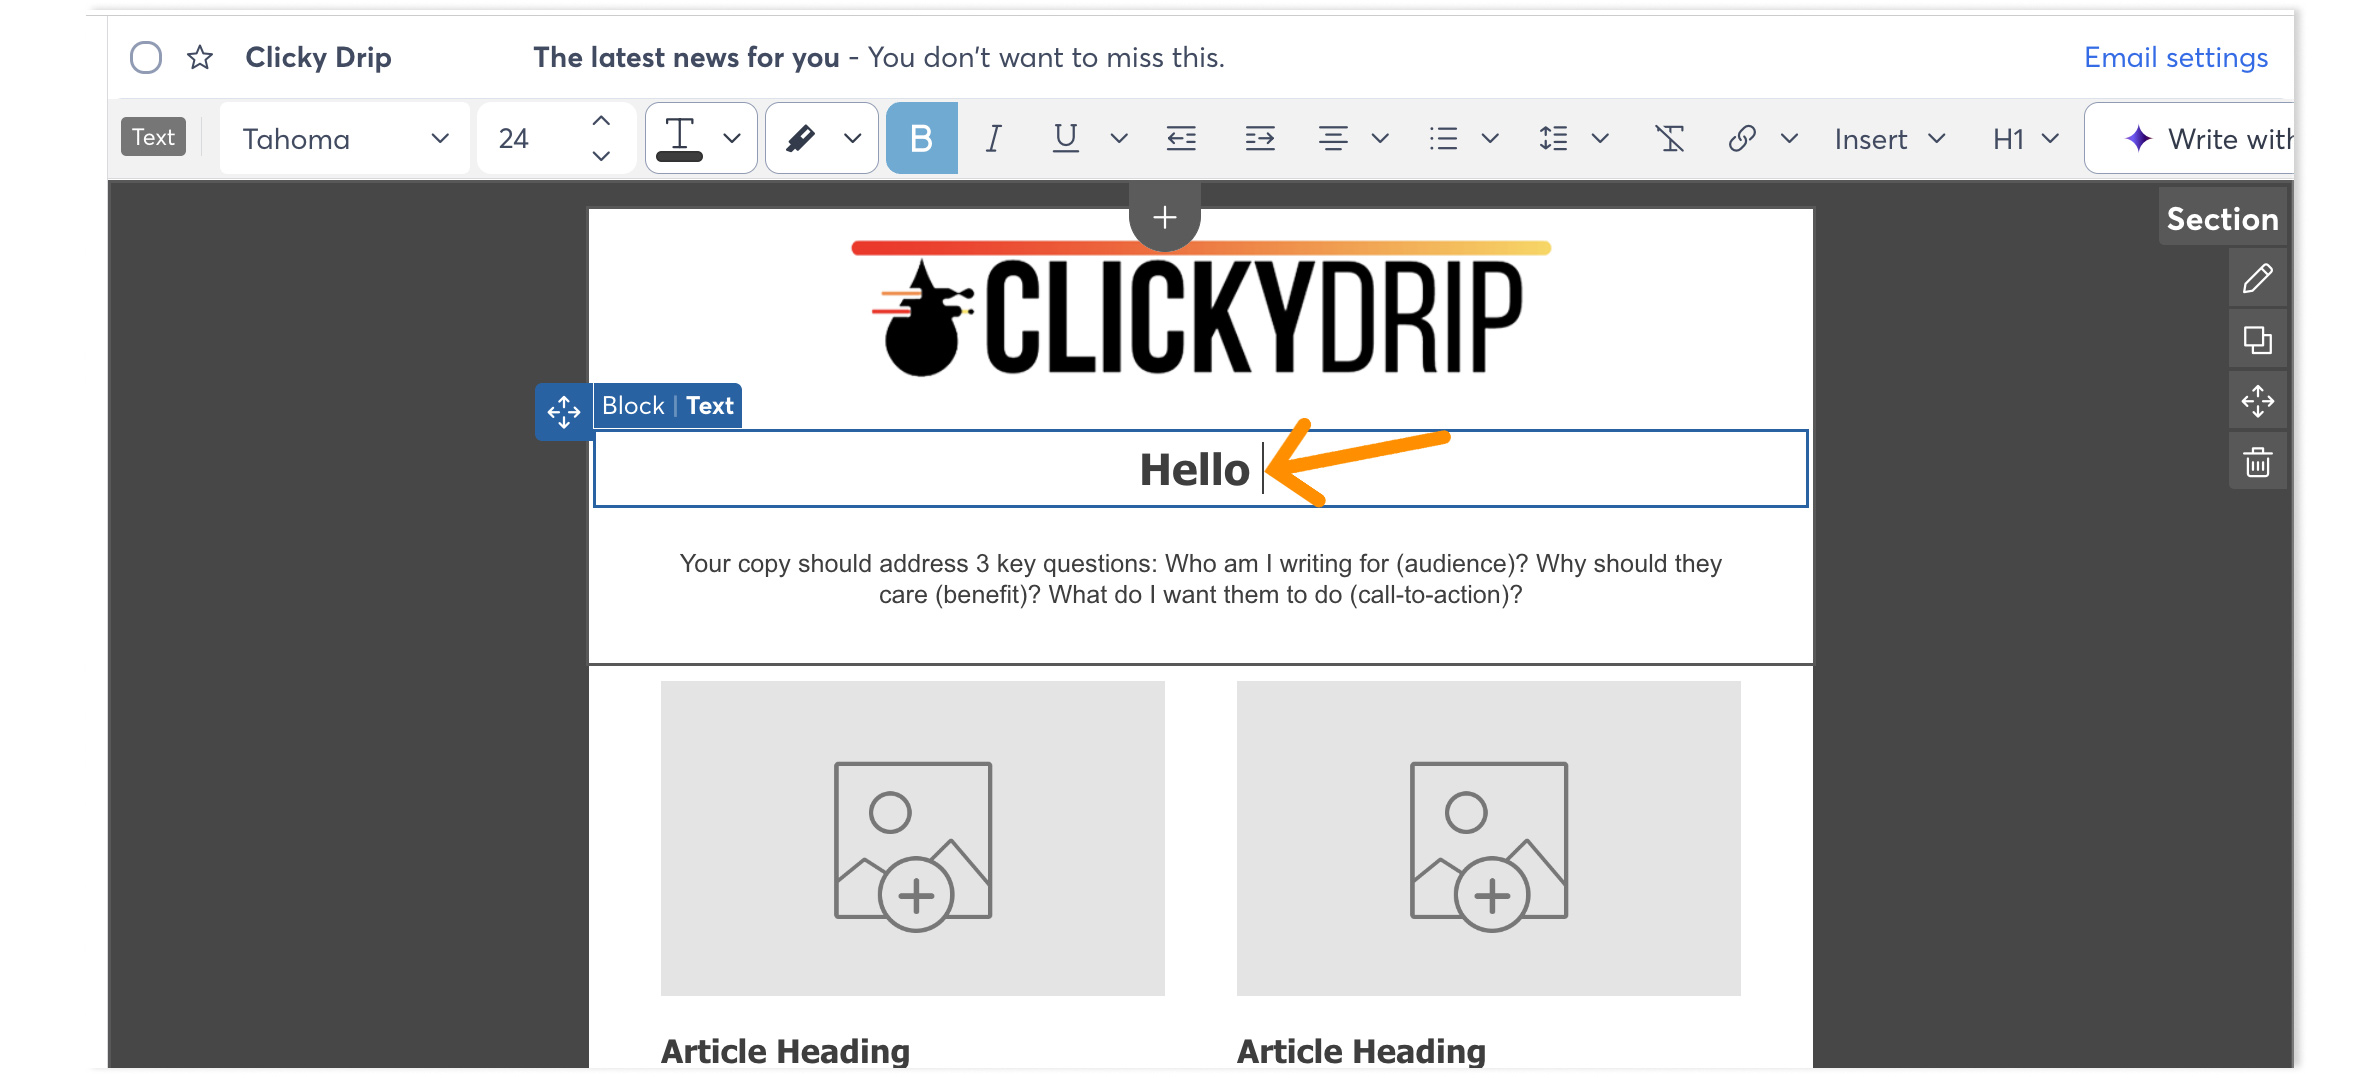
Once you select a template, you will be taken to the email editor where you can create your email. As you write your copy for your email, you can add fields wherever you wish in order to personalize your emails. For instance, to add the name field for your contacts, click the spot in your text where you want to insert your subscribers’ first name.
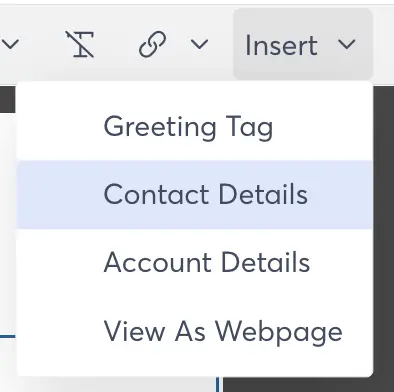
Click Insert and then Contact Details.
Select the first name detail. If you don’t have information on all your contacts, you may want to consider adding a fallback detail as well. A fallback detail will be used if the first name detail isn’t available for certain contacts. For this example, we will use “friend” as the fallback option.
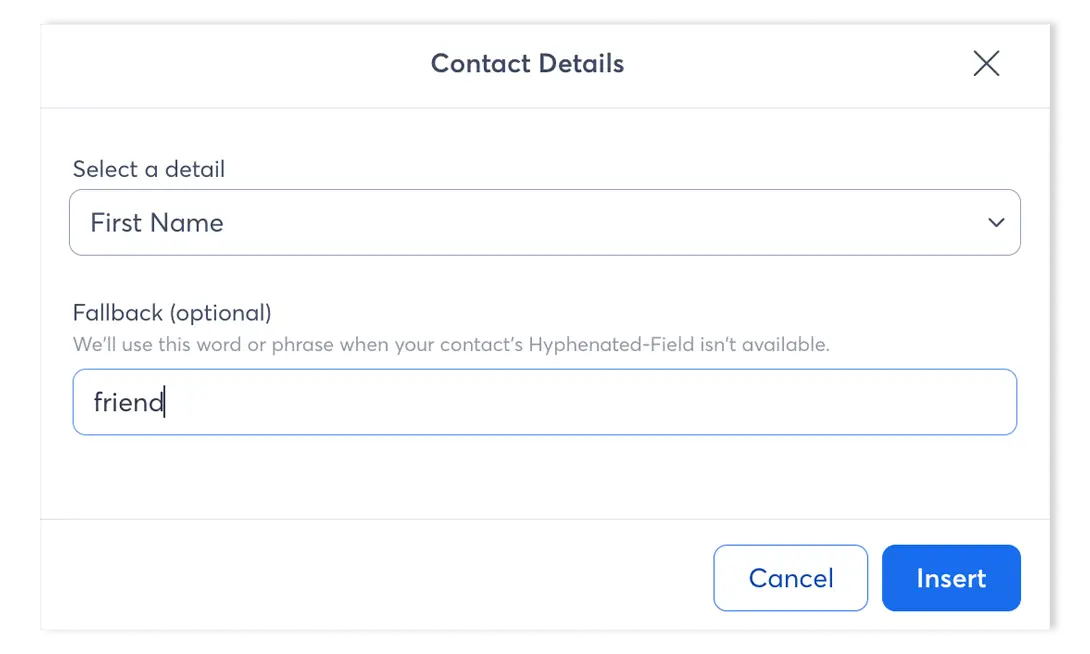
Click Insert.

At this point, you have successfully personalized your email. When you send this email, Constant Contact will automatically populate the first name field with the first name of every email subscriber.
Click Continue and then “Send Now” when you are ready to send.
Final Words
Knowing how to mail merge within Constant Contact can really help with your email marketing efforts. It allows you to deliver personalized and engaging content directly to your audience, as we have seen in this article.
By taking the time to set up your account correctly and customize your contact data, you can create more meaningful connections with your subscribers. Remember to regularly update your contact lists and analyze engagement metrics to keep your campaigns fresh and relevant. With these strategies in place, you’re well on your way to maximizing the potential of your email marketing and fostering stronger relationships with your audience.


One Response
Thank you for pointing out this process. It’s exactly what I was looking for 🙂